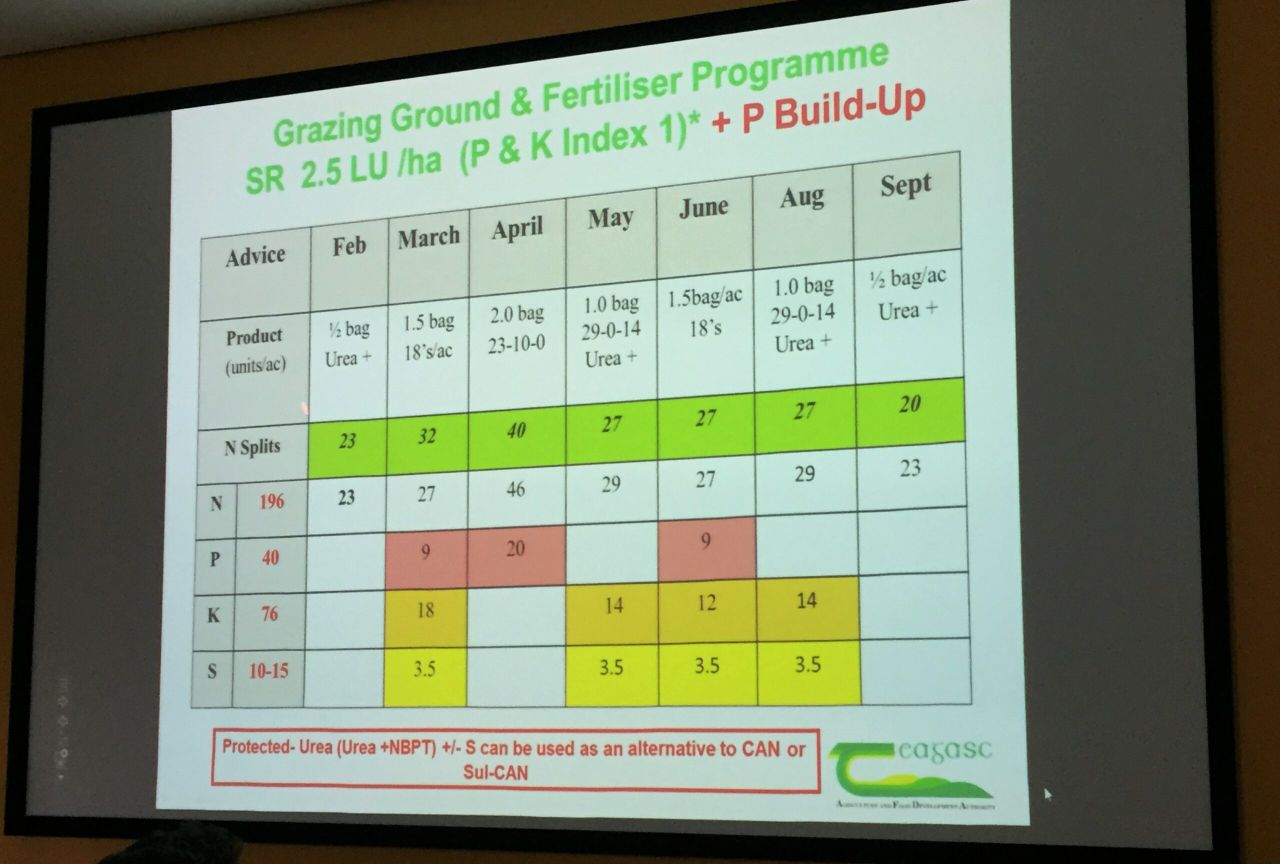
Correct spreader set-up avoids fertiliser waste

Start the spreading season off on a high with the correct set-up of your fertiliser spreader. Although the current wet weather conditions have put a damper on things, hopefully it’s not here to stay and farmers will be back out spreading in no time.
In the mean time, you should take a look at your fertiliser spreader and ensure it is set-up correctly.
Examining your fertiliser spreader, and ensuring it is set-up correctly, will mean that your fertiliser is spread as effectively and efficiently as possible with minimal wastage.
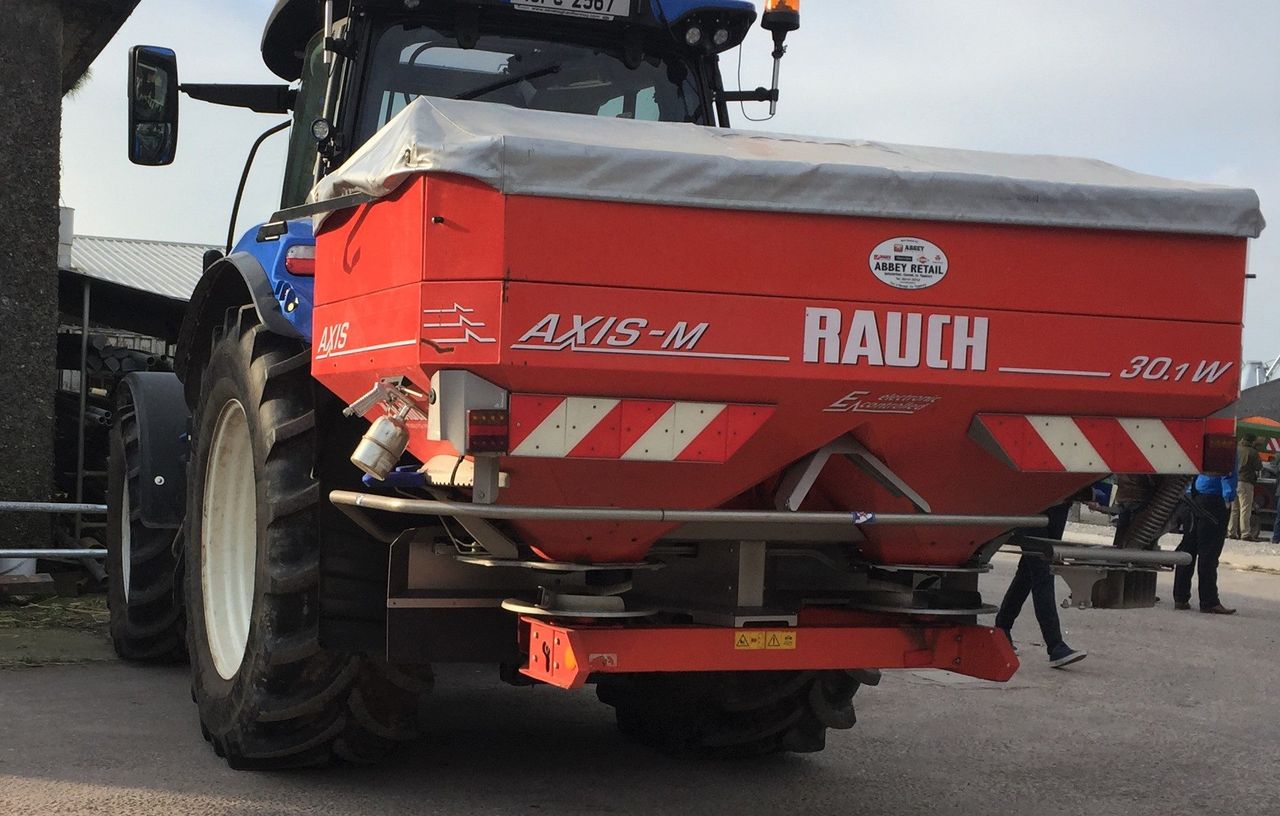
Along with setting up the spreader it should be examined for any wear and tear. Make sure there are no cracks or holes in the machine and that all parts are moving and operating as they should be.

The veins of the spreader should also be examined as they are a commonly worn part. They should be free from any holes or ripples. Any wear on the veins will have an impact on the spread quality or the evenness of the spread.